Connect the controller and sensor
Power the controller on the trusted show network, connect the commissioned wind sensor, and open HazeVane in a browser. Keep fixture output isolated during this first check.
 HazeVaneGet started
 Getting started
Set up HazeVane in the order an operator actually needs it: establish trustworthy wind, draw the site, add the hazers, connect the desk, and prove the system before show day.
Power the controller on the trusted show network, connect the commissioned wind sensor, and open HazeVane in a browser. Keep fixture output isolated during this first check.
Compare the on-screen wind with a known physical direction. Use the alignment control once, then confirm that “Flow toward” points where the air is actually moving.
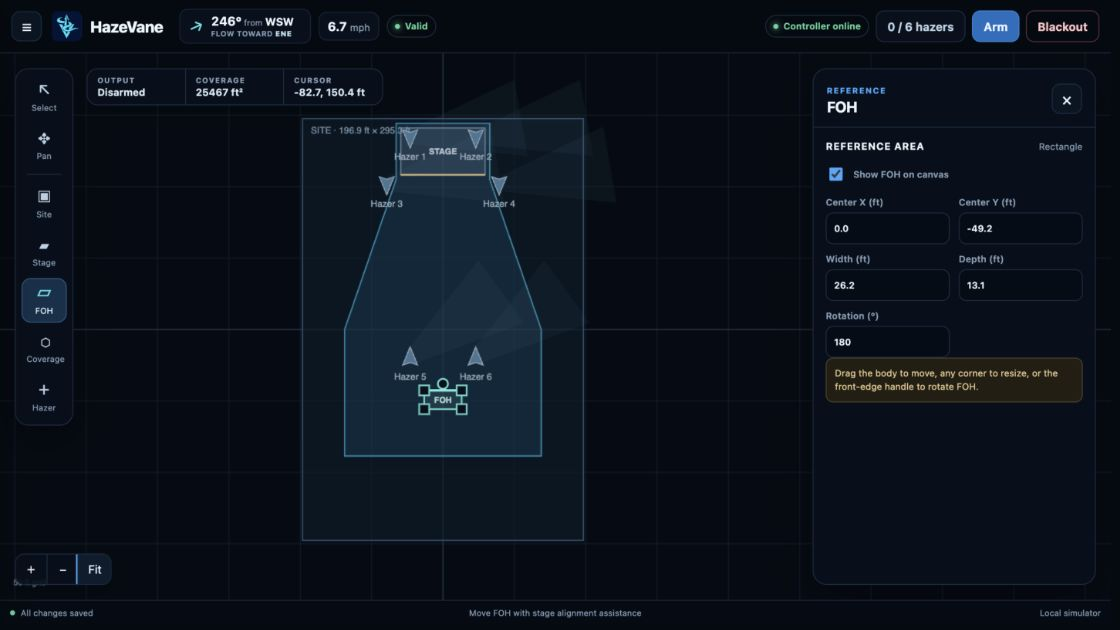
Choose your display units, size the site, place stage and FOH references, and draw the area where you want haze to travel.
Place each fixture on the canvas, choose its built-in or user profile, enter its patch, and set the limits you have verified for that machine.
Import the supplied fixture profile if you want desk control. Confirm that power, output, overall haze level, and individual tests behave as expected, then verify that receivers discover the active output universes.
Bring machines to Ready in a controlled environment, pulse them one at a time, and confirm that the physical output matches the selected fixture profile and canvas position.
Unplug or invalidate each important input in turn. Confirm the documented sensor fallback, console hold-and-return behavior, deliberate machine power, and network recovery.
Wait for “All changes saved,” download a complete backup, and record the sensor alignment, fixture profiles, patch, network settings, firmware version, and acceptance results.
Begin with hazer receivers disconnected or in a controlled test area. Learn the power and output controls before the system can affect the site.
Confirm the sensor is healthy and the direction matches the real world. The header arrow and “Flow toward” label should agree with what you observe on site.
Download a complete backup before major changes or firmware updates. It keeps the site configuration and every custom profile together; network changes still use a separate confirmed apply with automatic rollback.
The supplied profiles give the operator control of machine power, output, overall haze level, and a bounded test for each hazer. HazeVane continues to distribute the request across the site while the desk controls the intent.
The footprint uses slots 1–4 for takeover, power, output, and site demand; slots 5–20 test hazers 1–16. HazeVane advertises its active output universes automatically through E1.31 Universe Discovery—there is no separate setting. See the manual for values, source priority, timeout, and reconnect behavior.
Normal operation is only half the test plan.